以下是构建pfSense ISO文件的步骤。在看这篇教程之前,你可以先看看PiBa-NL的构建指南,但该指南对2.50版本不适合。以下教程针对2.5.0编写,也可以适用于其他版本。
一、选择构建的名称,并更新存储库
Netgate不允许其他人使用名称“pfSense”(由于商标许可的问题)来构建产品。在生成.iso文件之前,必须为防火墙选择一个自定义名称。在本教程中,我们使用libreSense,你也可以使用其他自定义名称。
然后,更新要使用的3个存储库:
FreeBSD Source
- fork https://github.com/pfsense/FreeBSD-src并签出到RELENG_2_5分支。
- 在文件夹/release/conf /中,将pfSense_src-env.conf,pfSense_src.conf和pfSense_make.conf重命名为libreSense_src-env.conf,libreSense_src.conf和libreSense_make.conf。
- 将文件/sys/amd64/conf/ pfSense重命名为/sys/amd64/conf /libreSense。
- 编辑文件/tools/tools/crypto/Makefile:从PROGS命令中删除cryptokeytest。
FreeBSD Ports
- fork https://github.com/pfsense/FreeBSD-ports并签出到devel分支(用于构建开发版)或RELENG_2_5_0分支(用于稳定版)。
- 在文件夹/sysutils/pfSense-upgrade/files/中,将两个文件pfSense-upgrade和pfsense-upgrade.wrapper重命名为libreSense-upgrade和libreSense-upgrade.wrapper。
pfSense GUI
- fork https://github.com/pfsense/pfsense 。
- 转到您要构建的分支中的文件夹/tools/templates/pkg_repos/(master为开发版,RELENG_2_5_0为稳定版)。
- 在文件名中将pfSense更改为libreSense(例如pfSense-repo.abi => libreSense-repo.abi)。
编辑文件/src/etc/inc/globals.inc: 用libreSense替换product_name的内容。- 在文件夹
/src/usr/local/share/, 将文件夹pfSense重命名为libreSense。
Netgate构建环境
了解我们将如何构建ISO以及搭建构建环境非常重要。
Netgate使用了一个非常繁琐的构建环境,如下图所示:

考虑本教程的目的不是建立商业化的构建环境,所以:
- 构建服务器还将充当用于交付PKG存储库的Web服务器(构建系统在制作ISO时正在积极使用PKG存储库)。
- PKG签名脚本将位于构建服务器上。
- 文件生成后将不会发送到外部NFS服务器。
下面来设置构建服务器。
二、设置合适的构建环境
下载并安装与要构建的版本匹配的FreeBSD服务器。 pfSense 2.5.0需要FreeBSD 12,使用AMD64平台架构。
服务器可以是VM或物理机。30 Gb以上的硬盘空间,多核CPU,内存大于8Gb。 可以在这里下载FreeBSD ISO文件。
服务器必须连接到Internet,可以在工作站使用SSH和HTTP访问。
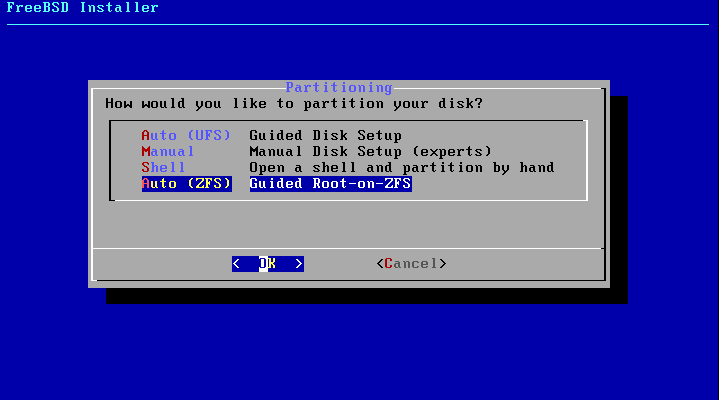
在安装过程中,请使用ZFS格式对磁盘进行分区。
1、服务器配置
服务器系统安装完成以后,需要进行一些更新和配置。以root用户身份登录并执行以下命令:
# Allow SSH using root, if you want it.
echo PermitRootLogin yes >> /etc/ssh/sshd_config
service sshd restart

# Required for configuring the server
pkg install -y pkg vim nano

# Required for installing and building ports
pkg install -y git nginx poudriere-devel mkfile rsync sudo

# Required for building kernel and iso
pkg install -y vmdktool curl qemu-user-static gtar xmlstarlet pkgconf openssl111

# Required for building iso
portsnap fetch extract

# not required but advised for building/monitoring/debugging
pkg install -y htop screen wget

# Only install this if your FreeBSD is a virtual machine
pkg install -y open-vm-tools
然后,为PKG托管和Poudriere监视配置nginx:
# pfSense_gui_branch represents the branch of pfSense GUI that will be compiled, with "RELENG" replaced by "v" : master for a development ISO, v2_5_0 for a stable ISO
# pfSense_port_branch represents the branch of FreeBSD ports that will be compiled, using the same replacement ("RELENG"=>"v") : devel for a development ISO, v2_5_0 for a stable ISO
# product_name represents the name of your product.

set pfSense_gui_branch=v2_5_0 # Replace with the version you want to build
set pfSense_port_branch=v2_5_0 # Replace with the version you want to build
set product_name=libreSense # Replace with your product name


cd /usr/local/www/nginx/
rm -rf *
mkdir -p packages
# PKG web server for core PKG repositories (pfSense-base, pfSense-rc, etc...)
ln -s /root/pfsense/tmp/${product_name}_${pfSense_gui_branch}_amd64-core/.latest packages/${product_name}_${pfSense_gui_branch}_amd64-core
# PKG web server for other PKG repositories
ln -s /usr/local/poudriere/data/packages/${product_name}_${pfSense_gui_branch}_amd64-${product_name}_${pfSense_port_branch} packages/${product_name}_${pfSense_gui_branch}_amd64-${product_name}_${pfSense_port_branch}
# Web server for monitoring ports build
ln -s /usr/local/poudriere/data/logs/bulk/${product_name}_${pfSense_gui_branch}_amd64-${product_name}_${pfSense_port_branch}/latest poudriere

# Allow directory indexing, and configure nginx to start automatically on boot
sed -i '' 's+/usr/local/www/nginx;+/usr/local/www/nginx; autoindex on;+g' /usr/local/etc/nginx/nginx.conf
echo nginx_enable=\"YES\" >> /etc/rc.conf
service nginx restart
2、设置签名密钥
在服务器中设置签名密钥。执行以下命令生成签名密钥:
mkdir -p /root/sign/
cd /root/sign/
openssl genrsa -out repo.key 2048
chmod 0400 repo.key
openssl rsa -in repo.key -out repo.pub -pubout
printf "function: sha256\nfingerprint: `sha256 -q repo.pub`\n" > fingerprint
然后在/root/sign /文件夹中创建一个脚本文件sign.sh。
#!/bin/sh
read -t 2 sum
[ -z "$sum" ] && exit 1
echo SIGNATURE
echo -n $sum | openssl dgst -sign /root/sign/repo.key -sha256 -binary
echo
echo CERT
cat /root/sign/repo.pub
echo END
最后,确保此脚本是可以执行的:
chmod +x /root/sign/sign.sh
3、配置pfSense
现在已经配置了服务器,我们将配置pfSense的编译方式。克隆pfSense GUI的fork,签出将要构建的分支,并配置fork来使用前面创建的签名密钥。
cd /root
git clone https://github.com/{your username}/pfsense.git
cd pfsense
git checkout ${pfSense_gui_branch}

# PKG signing key
rm src/usr/local/share/${product_name}/keys/pkg/trusted/*
cp /root/sign/fingerprint src/usr/local/share/${product_name}/keys/pkg/trusted/fingerprint
在pfSense GUI文件夹中创建一个名为build.conf的文件。
export PRODUCT_NAME="libreSense" # Replace with your product name
export FREEBSD_REPO_BASE=https://github.com/{your username}/FreeBSD-src.git # Location of your FreeBSD sources repository
export POUDRIERE_PORTS_GIT_URL=https://github.com/{your username}/FreeBSD-ports.git # Location your FreeBSD ports repository

export FREEBSD_BRANCH=RELENG_2_5 # Branch of FreeBSD sources to build

# The branch of FreeBSD ports to build is set automatically based on pfSense GUI branch.
# If you would like to build a specific branch of FreeBSD ports, the variable to set is POUDRIERE_PORTS_GIT_BRANCH
# Also, if you are building a FreeBSD port branch that does not respect Netgate conventions (devel or RELENG_*),
# You will also have to update .conf files in "tools/templates/pkg_repos/" because repositories names are partially
# hardcoded there.


# Netgate support creation of staging builds (pre-dev, nonpublic version)
unset USE_PKG_REPO_STAGING # This disable staging build
# The kind of ISO that will be built (stable or development) is defined in src/etc/version in pfSense GUI repo

export DEFAULT_ARCH_LIST="amd64.amd64" # We only want to build an x64 ISO, we don't care of ARM versions

# Signing key
export PKG_REPO_SIGNING_COMMAND="/root/sign/sign.sh ${PKG_REPO_SIGN_KEY}"

# This command retrieves the IP address of the first network interface
export myIPAddress=$(ifconfig -a | grep inet | head -1 | cut -d ' ' -f 2)

export PKG_REPO_SERVER_DEVEL="pkg+http://${myIPAddress}/packages"
export PKG_REPO_SERVER_RELEASE="pkg+http://${myIPAddress}/packages"

export PKG_REPO_SERVER_STAGING="pkg+http://${myIPAddress}/packages" # We need to also specify this variable, because even
# if we don't build staging release some ports configuration is made for staging.
三、创建ISO文件
首先,使用命令screen -S build在构建服务器上启动一个屏幕。可以使用ctrl + A,然后使用D离开此屏幕,并可以使用命令screen -r build再次进入此屏幕。
1、设置Jails
执行命令: ./build.sh --setup-poudriere。这将设置环境并创建构建所需的FreeBSD jail 。然后可以离开屏幕,执行tail -f logs/poudriere.log检查是否已设置完成。 预计该命令将运行约半小时。
如果出现问题:
- 可以在build.sh的开头添加set -x来调试查看其中发生的情况。
- 可以使用命令
poudriere jail -l列出创建的jails ,也可以使用poudriere jail -d -j {jailName} -C clean删除创建的jails 。 - 还可以验证是否为FreeBSD端口build.conf输入了错误的URL。这会导致命令无法执行(在这种情况下,会在日志中显示一条消息,请输入“https://github.com”的用户名)。
2、建立端口
执行./build.sh --update-pkg-repo来编译pfSense的〜500 FreeBSD端口。可以使用HTTP监视服务器上的构建环境(http://服务器IP地址/poudriere)。预计运行时间2到4个小时。
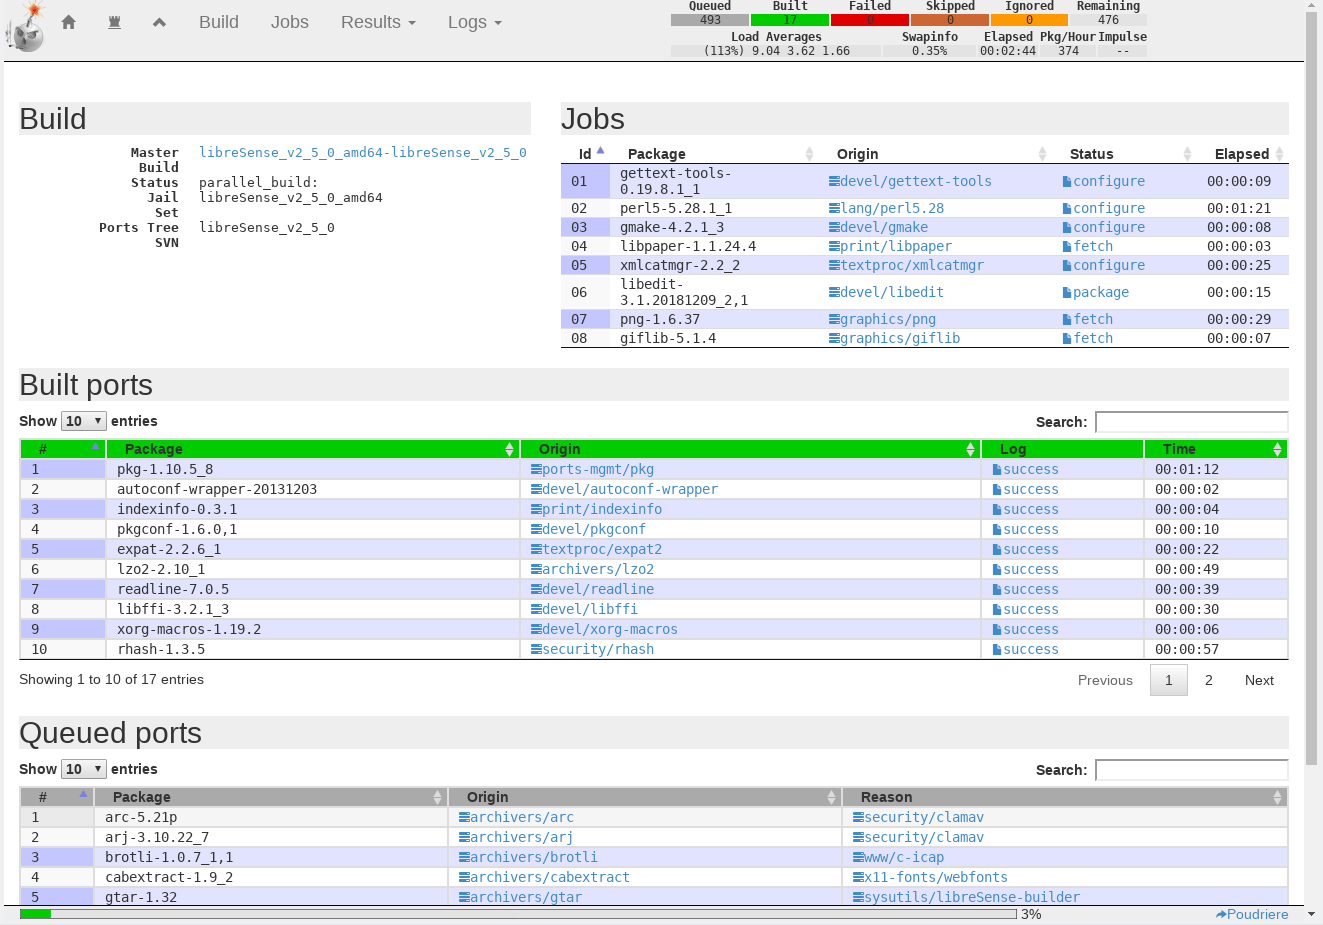
如果出现问题,可以使用HTTP或直接在服务器的/usr/local/poudriere/data/logs/bulk/目录中查看日志文件。需要分析每个失败端口的日志,来查找每个端口的问题。
可能的原因:
- 试图构建的FreeBSD-port分支与构建服务器的FreeBSD版本不匹配。
- 尝试构建pfSense的版本过时,并且某些dist文件在FreeBSD官方distcache上不再使用,从而导致无法获取文件。
- 可以在FreeBSD端口的GitHub分支中更新每个相关端口的distinfo,然后运行
./build.sh --update-poudriere-ports来刷新构建服务器上的文件。 - 或者找到任何旧的dist镜像(例如该镜像),将构建服务器上的文件下载到其匹配的文件夹中(使用
wget/curl),然后继续构建。
- 可以在FreeBSD端口的GitHub分支中更新每个相关端口的distinfo,然后运行
需要先构建所有端口,然后再继续下一步。如果不想建立一个端口,则可以通过在poudriere_bulk中删除该端口来进行排除。
3、构建内核并创建ISO
执行命令./build.sh --skip-final-rsync iso构建内核,然后设置端口并创建ISO文件。该命令将运行约一小时左右。
构建过程可以从pfSense GUI的logs/目录中的两个文件进行查看:
buildworld.amd64,installworld.amd64和kernel.libreSense.amd64.log包含与FreeBSD内核构建有关的日志。install_pkg_install_ports.txt包含有关端口安装的日志。从build.conf文件中指定的URL可以检索到它们。isoimage.amd64和cloning.amd64.log包含有关ISO本身构建的日志。
在构建结束时,~pfsense/tmp/${product_name}/installer/中将存在一个压缩的iso文件(.iso.gz)文件。如果需要普通的ISO文件,可以使用gzip -kd *.gz进行提取。
4、故障排除:
导致构建失败的一个非常可能的原因,与Makefile系统的工作方式和不幸的时机有关。通常会发生以下情况:
- Netgate从
FreeBSD-ports建立端口XXX。 Poudriere将端口标记为已构建,并且除非对代码进行了更新(“配置缓冲”),否则不会尝试重新构建它。 - Netgate不会刷新
FreeBSD-ports上的pfSense分支。 - 端口所有者更新了其构建要求(
distfile更新),或Netgate更新了其构建环境(例如:openssl => opensll111),但是不会重新构建已构建的软件包,因为在端口上未进行任何配置更改。此时,任何不更新FreeBSD-ports而重建端口的尝试都将失败。
FreeBSD-src的内容也是如此。解决此问题的推荐方法是简单地重新同步上游发生故障的模块,以便拥有最新的ISO。
同样,Netgate过去也被指控在Freebsd-src上执行延迟的开源。目前尚不清楚是否是由于用户对构建系统的工作方式有误解,还是Netgate的阴暗做法或临时维护。如果发生这种情况,可以直接将FreeBSD源与分支合并。
四、正版ISO和自己构建ISO之间的区别
自己构建的ISO与Netgate发布的pfSense ISO的构建方式相同,包含相同的代码。但有一个主要区别:自己构建的ISO不包含GNID。
GNID是一个二进制文件(位于/usr/sbin/gnid),用于管理pfSense的Netgate许可证。该二进制文件为每个正版pfSense生成一个唯一的Netgate ID。然后,在使用PHP发出HTTP请求时,生成的唯一ID将成为默认“用户代理”的一部分(HTTP请求用于获取Bogon,安装软件包,显示第一条版权消息等)。访问pfSense上的Netgate服务(例如ACB或专业支持)也是必需的。
该二进制文件的工作方式是已知的(使用radare2快速查看该二进制文件,可以发现它试图获取其运行的平台信息,如果平台不是Netgate硬件,则它将使用sha256和设备的MAC地址来计算ID),但是此程序是Netgate的属性,并且是封闭源代码(存储在Netgate的内部GitLab中)。
由于自己构建的ISO不包含GNID,因此可能无法从Netgate检索bogon更新、使用ACB、从官方存储库安装软件包或寻求Netgate的专业支持,当然也不会收到最新的pfSense更新。
原文地址。
相关文章:从开源防火墙源码编译得到到ISO文件